I have been reluctant to write a post on the best exercises for knee pain. This is because I don’t want you to blindly follow a list of exercises without considering why you are doing them, how they might help and how you can adapt them.
However, I realise that a lot of people need something as a starting point that can then be adapted and progressed later. Please use some of the theory in this post, and in the other posts that are linked to, to try and adapt the program below so that it meets your individual requirements.
Click to Get StartedI also need to start by saying that there are many different causes of knee pain and that if you are worried or unsure, you should seek out medical advice.
What is a bad exercise for your knees?
That is a bit of a trick question. There is no such thing as a good or bad exercise for your knees. Instead, there are exercises that put a higher load through the knees and those that put a lower load through the knees.
The right question should be… Can I tolerate the load that a particular exercise puts through my knees?
If you haven’t already read my previous post on Load Tolerance, please go and read it now. Then come back and finish the rest of this post, it will make a lot more sense.
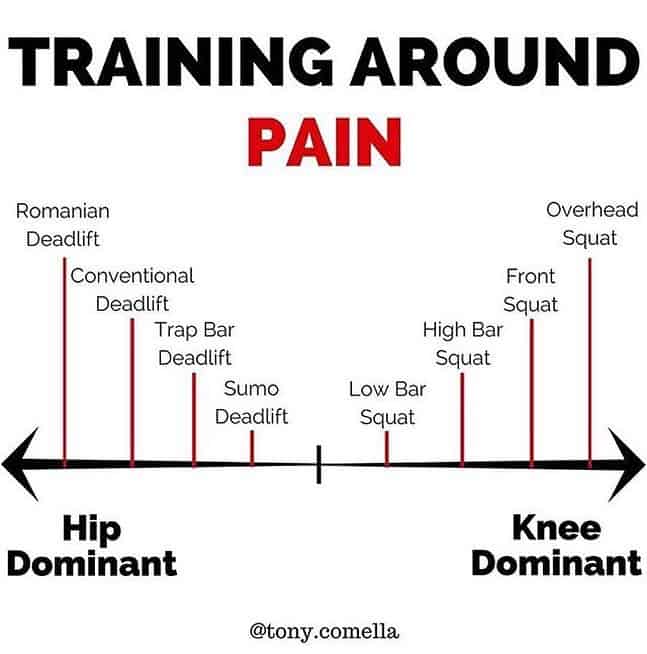
Knee or Hip Dominant
The majority of compound exercises that strengthen the legs (deadlift, squat, lunges etc) share forces between your hips and your knees. Some exercises will place a higher proportion of that force through the hips (hip dominant) and others through the knees (knee dominant).
We can use this knowledge to our advantage when exercising with knee pain. The image below illustrates this brilliantly. Rather than resting and avoiding exercise (which allows muscles to decondition) you can just move in a different way to prevent pain from stopping you exercising.
3 Exercises for Knee Pain
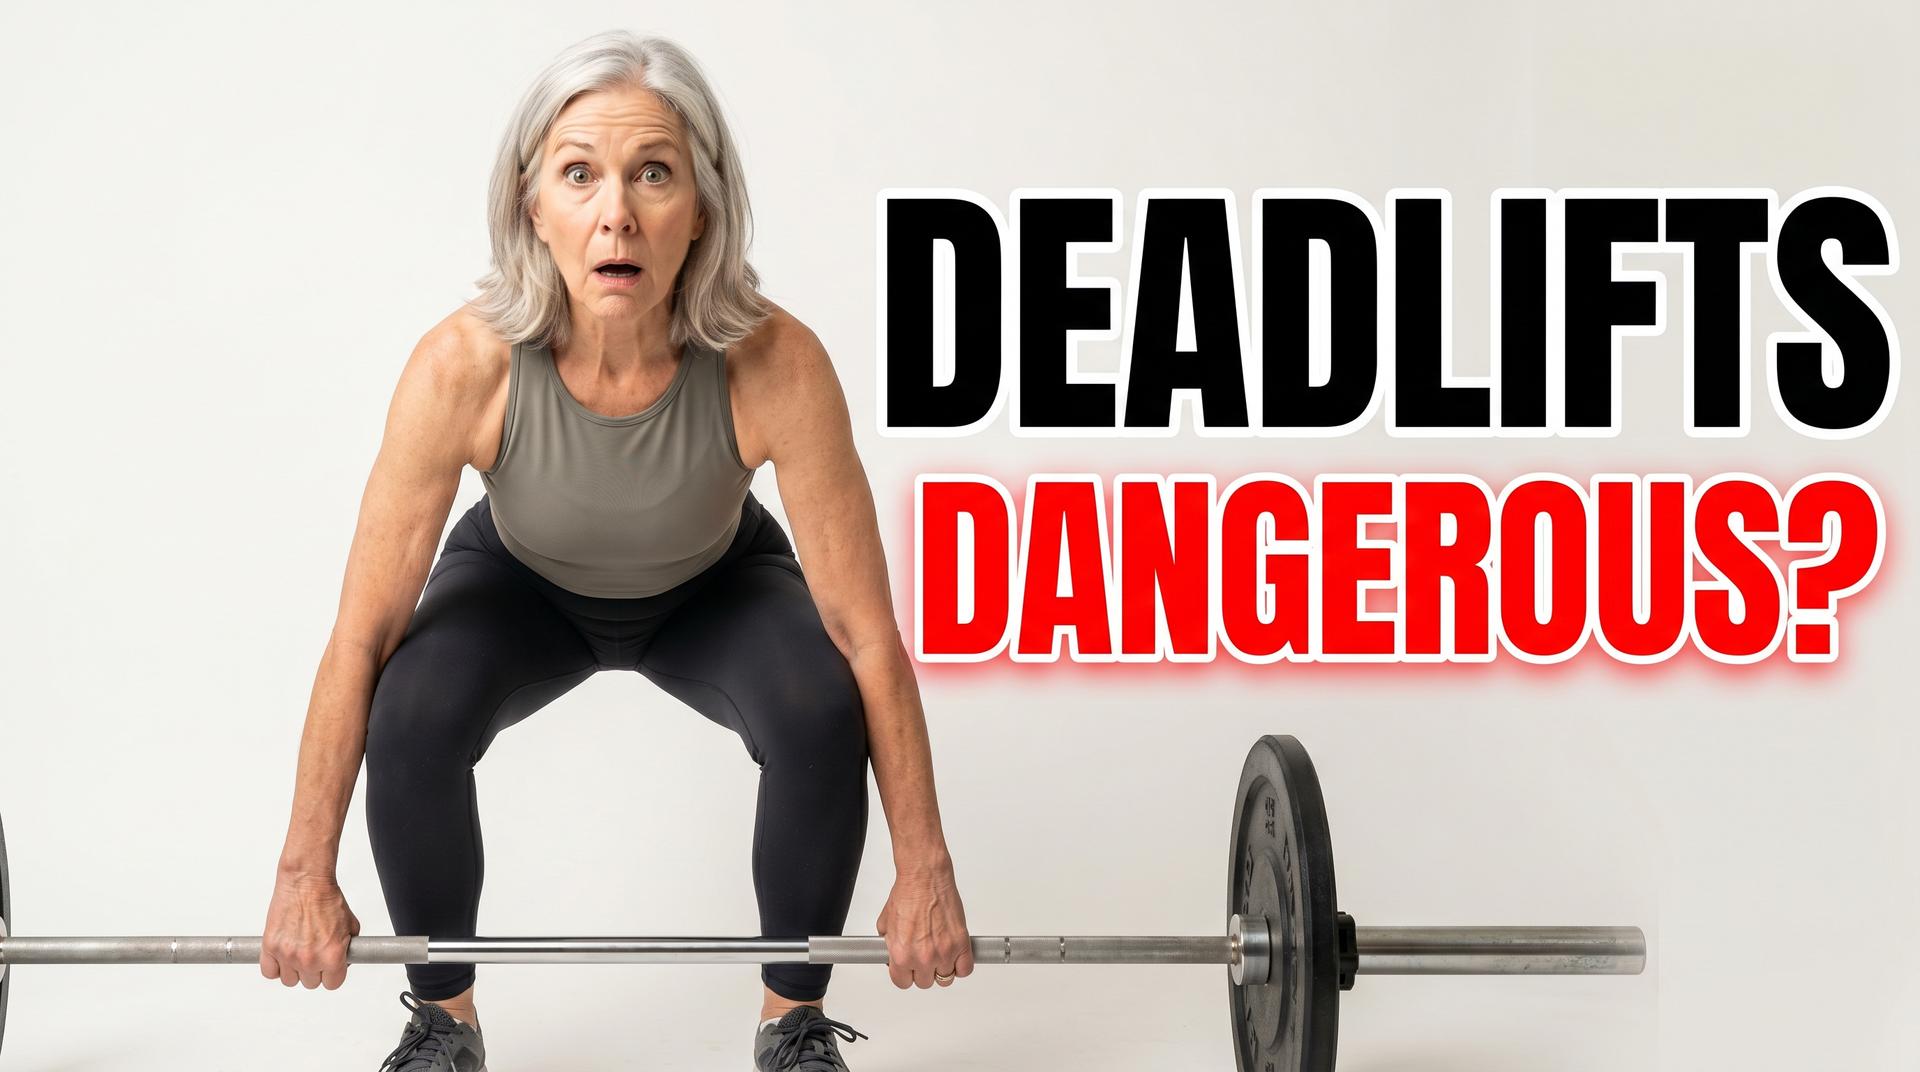
Romanian Deadlift
As you can see from the image above, the Romanian deadlift is a hip dominant exercise. This means that you can still lift a heavy weight and not load your knees excessively.
There is no need to reduce the loads used in all exercises, we just need to temporarily reduce the high loads through your knees that cause you pain.
I have picked the Romanian deadlift here because it places the least amount of load through your knees. You can substitute this for any of the exercises above that you can currently tolerate with a load.
The video above shows the Romanian deadlift. It can be a tricky exercise to master initially so I would start with a lighter weight until you feel confident with the technique.
A couple of cues that have helped me teach the Romanian deadlift are:
1: “Imagine you’re standing on the edge of a cliff and you’re trying to peer over the edge but leaning back to avoid falling forwards”.
2: Stand one foot’s length away from a wall. When you hinge the hips, move them back until you can feel your bum touch the wall (don’t lean back onto the wall). As you lean your body forwards, don’t let your bum move away from the wall and don’t allow your knees to move in front of your feet (try to keep your shins vertical).
If your struggling with the technique of the Romanian deadlift then don’t be afraid to approach a personal trainer in the gym to help you.
Knee Extension with Red Powerband
This is a brilliant exercise because the force produced by your muscles (in this case the quadriceps) will be isolated to your knee and not your hips.
This is good because by using the powerband you can alter the resistance placed on the quadriceps. This means you can start with a lower resistance to avoid aggravating your knee pain.
Over the course of several sessions, the resistance can be increased gradually to allow you to tolerate more force through your knees.
This can be done in two ways:
- Move the chair further away from where the band is anchored. This will increase the tension of the band.
- Try a wider powerband with more resistance.
Box Squat
A box squat refers to a squat where you lower yourself to a surface (such a box or a chair) and then return to standing. The deeper the squat is, the higher the force placed on the knees.
By working on a shallower squat, we can strengthen the muscles in your legs in a squatting action. We can do this without risking squatting too deep which may have aggravated your knee pain.
If you can tolerate a bodyweight box squat, you can then add a load (in the form of a kettlebell or barbell). Once again you can gradually increase the load to progress the exercise.
The other way you can progress is to gradually reduce the height of the surface you squat down to. I would not increase the load at the same time as reducing the height. Only change one element at a time.
Tip: Try not to commit to sitting on the surface as you squat down to it. Tap the surface with your bum and return to the start position. The surface is purely there as a reference point as to how far you squat down. It can also provide confidence that you can fall back onto the surface should the exercise become difficult of painful.
How many repetitions should I do?
I won’t go into the theory too much here as I have already written another post, What are reps and sets?, which covers it more detail.
The important part is that for each exercise you try to challenge yourself. You should be aiming to reach failure with the exercises. This refers to your last repetition being the last that you could manage. You shouldn’t stop just because you reached your target number. If you could have done more (without aggravating your pain) you should have been lifting a heavier weight.
You should look to do 3 sets of each exercise ensuring you have 1-2 minutes rest between sets. I then suggest doing these 2-3 times per week but not on back to back days.
Initially, we do need to be careful that we don’t aggravate your pain. I suggest starting by aiming for 3 sets of 15 repetitions of each exercise.
Once you can do 15 with adequate resistance and without any flare-up of pain, you can then increase the resistance to reduce the repetitions. A 12-week program might look like this.
- 1st week = 15 repetitions
- 2nd-3rd week = 12 repetitions
- 4th-5th week = 10 repetitions
- 6th-8th week = 8 repetitions
- 9th-12th week = 6 repetitions
Equipment
You can find some of the equipment used in the video above by clicking on the images below.


Make sure you go and ‘Like’ the Never Too Old to Lift Facebook page.

This post was written by myself, Chris Tiley, a physiotherapist based out of Movement Therapy Clinics in Harborne, Birmingham. For more information on how I can help you visit christileyphysiotherapy.com
Some of the links above are affiliate links. This means that if you choose to make a purchase, I will earn a commission. This commission comes at no additional cost to you. Please understand that everything I recommend is because I honestly believe they are all helpful and useful to assist you in achieving your goal in becoming stronger, not because of the small commissions I make if you decide to buy something. Please do not spend any money on these products unless you feel that you need them or believe that they will help you achieve your goals.

6 responses
I am very thankful that I have never suffered knee pain (fingers crossed). This sounds like a great list of exercises!
This is a great post! Thanks for the detailed descriptions of the various moves. Knock wood, I’ve never had knee problems (other than a freak staph infection that required emergency surgery).
I had runner’s knee a few years ago and it was so weird because I didn’t really have any pain but I woke up one morning and my knee was the size of a balloon. I had to get the excess fluid drained and did a few weeks of PT . Thankfully I’ve never had that issue again (knock on wood).
This is good information. My knees are in good shape (knock-on-wood) but it’s good to know how to take care of them.
I think Romanian deadlift was the first lift I ever learned! :O Thankfully, I don’t have any knee pain right now (here’s to hoping it stays that way…), I need to incorporate em’ back into my workouts again!
Knee pain is not one of my weaknesses, thank goodness. I have annoying hips, but I am working through it.
It’s definitely hard to recommend something with pain and injury in mind, but this is a very thoughtful piece.